Reparación de Baterías Electrónicas Simplificada: Una Guía Práctica para Músicos y Técnicos
Compartir
Los tambores electrónicos son notablemente fiables, pero incluso los mejores kits desarrollan problemas con el tiempo: disparos erróneos, diafonía, puntos calientes, parches de malla desgastados, sensores de platillo rotos o controladores de hi-hat cansados. La buena noticia es que la mayoría de las fallas son fáciles de diagnosticar y reparar en casa con las piezas de repuesto adecuadas y un enfoque metódico. Esta guía te lleva a través de los síntomas comunes, cómo aislar la causa y qué piezas de repuesto pueden devolver tu kit a un rendimiento listo para el escenario
Comienza con una solución de problemas inteligente
Comienza descartando las variables más simples. Cambia el cable del pad por uno que sepas que funciona y conecta el pad problemático a otra entrada del módulo. Si el problema sigue al pad, estás ante una falla del pad o de la PCB interna. Si permanece en la misma entrada, puede ser un problema de cable o configuración del módulo. Vuelve a colocar todos los conectores, revisa que no haya jacks TRS doblados y restablece la configuración del pad a valores predeterminados sensatos antes de abrir cualquier cosa. Cuando abras un pad o platillo, desconecta la alimentación del módulo para evitar cortocircuitos accidentales
Parches de malla, placas de disparo y control de puntos calientes
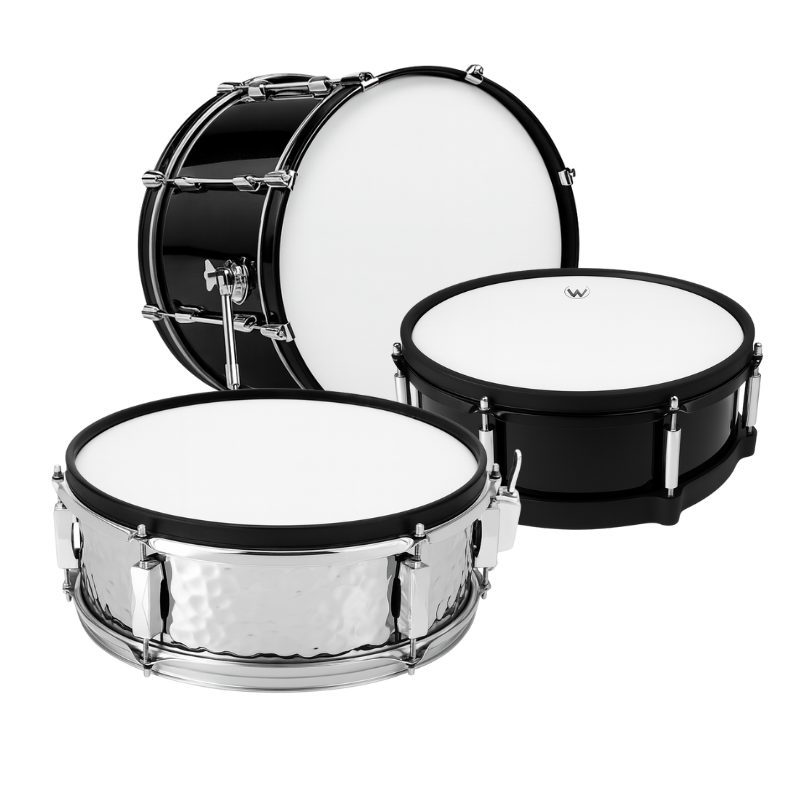
Los disparos desiguales y los puntos calientes suelen deberse a un parche estirado o a una matriz de sensores mal distribuida. Retensa la malla hasta que el rebote se sienta natural y el aro siga disparando de forma fiable. Si reemplazar el parche o reajustarlo no lo soluciona, considera actualizar la placa de disparo interna para una sensibilidad más uniforme en toda la superficie de juego. Una opción robusta es una conversión de caja de doble zona usando una matriz multipunto como la 14" Dual-Zone Trigger Plate with 6 Trigger Points. Los puntos de disparo adicionales distribuyen la respuesta, reduciendo los puntos calientes y ofreciendo una articulación consistente desde el centro hasta el borde
Para los bombos que disparan doble o fallan golpes, una solución integrada de malla y sensor diseñada para ello suele ser la reparación más rápida. Una actualización plug-and-play como la 22" Bass Drum Mesh Head with Built-In Trigger puede estabilizar el seguimiento, controlar el rebote de la maza y proporcionar una sensación sólida y de bajo ruido bajo el pie
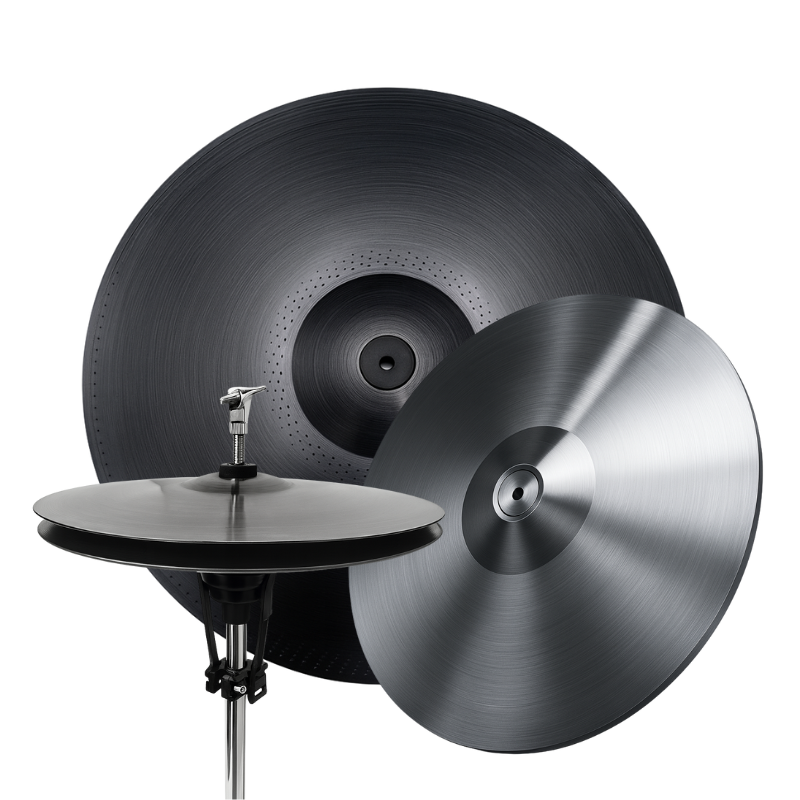
Problemas con platillos: borde, copa y choke
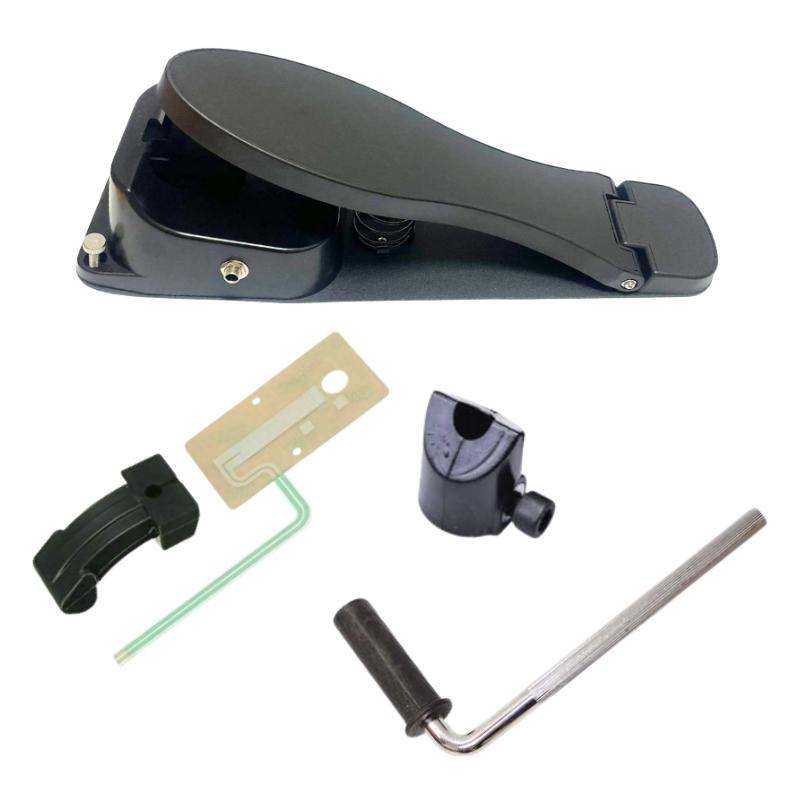
Los disparadores de platillos reciben mucho castigo y sus piezos o sensores de choke pueden fatigarse con el tiempo. Los golpes intermitentes en el borde o los chokes fallidos suelen deberse a una PCB de sensor desgastada, cableado desplazado o una placa agrietada. Reemplazar la placa interna es sencillo con la pieza adecuada. Para reparaciones dedicadas de platillos, considera la Electronic Cymbal PCB (Dual Input, Piezo + Edge) para restaurar la detección de copa/borde y un choke fiable
Si tu platillo sigue girando y enredando cables, instala un accesorio adecuado anti-rotación. Una pequeña mejora mecánica como el Electronic Cymbal Rotation Stopper bloquea la orientación para que el borde y el choke caigan exactamente donde tu memoria muscular espera
Cuando estés listo para una actualización completa de platillos con jugabilidad moderna, un reemplazo como el 20" Electronic Cymbal with 360° Edge Trigger ofrece detección sensible de copa/borde alrededor de todo el perímetro para crescendos naturales, acentos y choke consistente
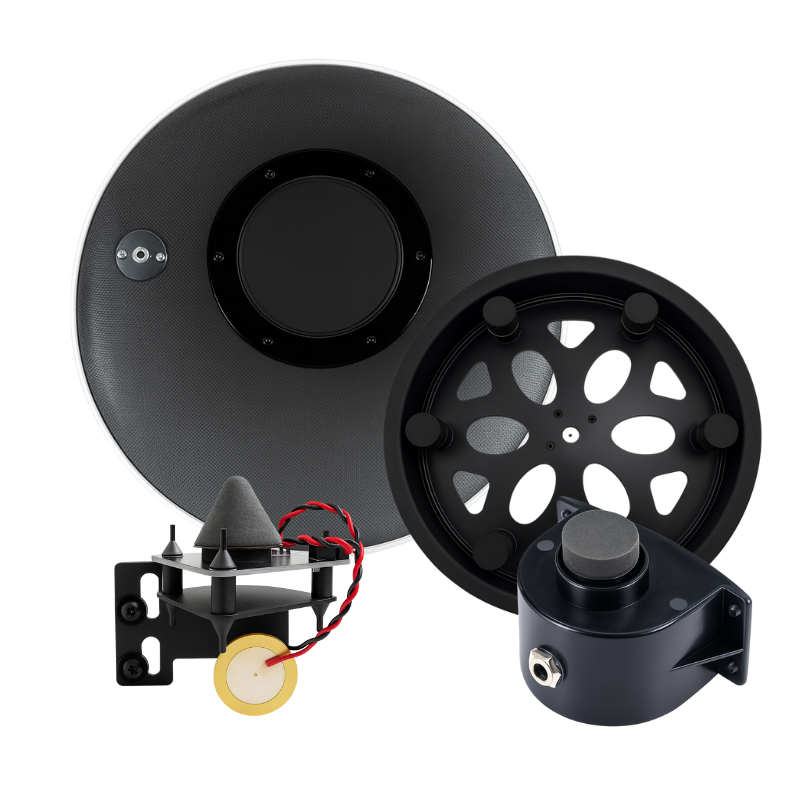
PCBs de tambores, sensores de aro y control de diafonía
La diafonía entre aro y aro o entre parche y aro en cajas y toms suele deberse a una ganancia demasiado alta, tornillería suelta o un sensor de aro defectuoso. Primero baja la sensibilidad y aumenta ligeramente el tiempo de escaneo en el módulo, luego verifica que los tensores y montajes estén firmes y que los conos de espuma hagan buen contacto con el parche. Si el aro sigue comportándose de forma errática, reemplazar la placa interna de doble zona es una cura fiable. La Electronic Drum PCB (Dual Zone, Head + Rim) restaura una separación limpia de zonas y dinámicas predecibles, especialmente en cajas tocadas con fuerza en conciertos
Controladores de hi-hat y sensación al pie
Los problemas de hi-hat se manifiestan como un seguimiento pobre de la apertura, estados medio abiertos inestables o zonas muertas. Después de calibrar el hi-hat en tu módulo, si la respuesta sigue errática, inspecciona el actuador mecánico o el sensor de lámina. El desgaste en el actuador de goma es común y fácil de reparar con la pieza adecuada. Un reemplazo específico como el Roland FD-8 / TD-1 Hi-Hat Sheet Sensor Rubber Actuator restaura una respuesta suave y lineal del pedal y una detección precisa del chick sin necesidad de cambiar todo el controlador
Cables, arneses y ruido
Los crujidos, cortes o golpes débiles en el aro suelen deberse a cables envejecidos o cables TS/TRS incompatibles. Mantén cables de alta calidad y cortos cuando sea posible y enrútalos lejos de fuentes de alimentación y adaptadores de pared. Si necesitas cableado nuevo, explora la Electronic Drum Cables collection para cables TRS blindados y reemplazos ordenados que reducen el ruido eléctrico y mantienen una fuerte integridad de señal
Configuraciones del módulo que importan
Incluso el hardware perfecto necesita una configuración correcta del módulo. Comienza con sensibilidad conservadora, umbral moderado y tiempos de escaneo adecuados para parches de malla. Usa los controles integrados de diafonía y tiempo de máscara del módulo para separar pads adyacentes en el rack. La selección de curva es crucial: una curva lineal o logarítmica que se adapte a tu toque puede desbloquear dinámicas que no sabías que existían. Siempre recalibra el hi-hat después de cualquier cambio mecánico y guarda un kit de respaldo con configuraciones conocidas para poder revertir rápidamente si los experimentos salen mal
Cuándo reparar y cuándo actualizar
Si un pad o platillo tiene fallas repetidas o has agotado las configuraciones sin estabilidad, actualizar componentes selectos suele ser más rentable que perseguir fallas intermitentes. Combinar una nueva placa de disparo en la caja, un actuador de hi-hat renovado, un juego de cables fiable y un platillo no rotatorio con detección de borde 360° puede transformar un kit envejecido por mucho menos que un reemplazo completo. Las soluciones mixtas, como combinar la placa de disparo de doble zona con un bombo de malla suave y una PCB moderna de platillo, pueden dar como resultado un kit que se siente más ajustado, rastrea mejor y se mantiene silencioso en apartamentos y estudios
Aprende, prueba y comparte
La reparación práctica es más fácil cuando puedes ver los pasos. Para guías de construcción, proyectos detrás de cámaras y demostraciones, síguenos en YouTube y nuestras actualizaciones diarias en Instagram y Facebook. Si te quedas atascado, envía un mensaje rápido con el modelo de tu módulo, tipo de pad y un clip corto del problema. Estamos encantados de ayudarte a elegir la pieza de repuesto correcta y ajustar la configuración
Notas de seguridad y garantía
Desconecta el módulo antes de abrir cualquier pad, evita descargas estáticas tocando metal conectado a tierra y nunca aprietes demasiado los tornillos de montaje de la PCB. Si tu kit está en garantía, revisa los términos antes de abrir las conchas o reemplazar piezas. Conserva las cajas y espumas originales por si necesitas devolver un artículo, y prueba cada reparación individualmente para poder aislar cualquier error antes de reensamblar todo el equipo
La mayoría de las reparaciones de tambores electrónicos siguen unos pocos patrones: sensores cansados, parches estirados, cables defectuosos y configuraciones mal ajustadas. Con algunos reemplazos enfocados, como una dual-zone trigger plate, una reliable cymbal PCB, un integrated mesh kick, un fresh hi-hat actuator y quality cables, puedes restaurar una jugabilidad de nivel profesional rápida y económicamente. Si tu platillo sigue girando o chokeando de forma inconsistente, un rotation stopper y un 360° edge cymbal ofrecen ese último toque de pulido que los profesionales notan y los ingenieros aprecian