Getting to Know – Roland TD-17
Share
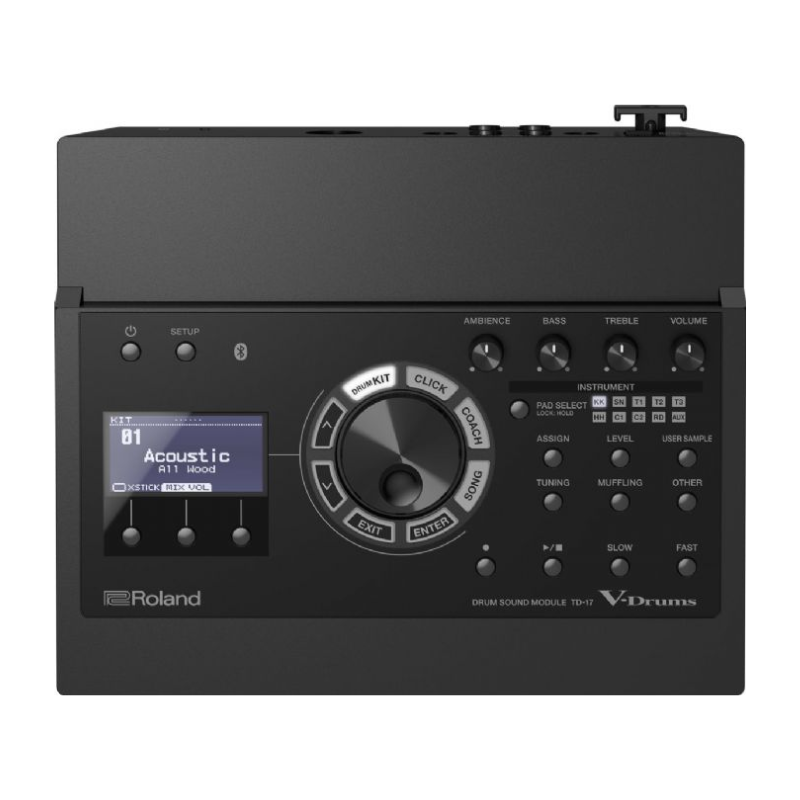
Getting to Know the Buttons – Roland TD-17
The TD-17 sound module is powerful yet user-friendly. Let’s break down the main buttons and controls so you know exactly what each one does and how it helps you shape your drum experience.
1. KIT
This button lets you scroll through and select different drum kits.
Each "kit" is a full set of drum sounds (e.g., rock kit, jazz kit, electronic kit).
Use the + / – buttons or dial to navigate.
2. EDIT
Press this to edit or customize your selected kit.
You can change pad sounds, volume, pitch, reverb, and more.
This is where you fine-tune your drums to match your style.
3. INST (Instrument)
Choose this to adjust the individual sound for each pad.
Example: You can make the snare deeper or switch your hi-hat to an electronic splash.
4. COACH
This opens up practice tools like time checks, warm-ups, and tempo training.
Great for improving timing and technique.
5. SONG
Lets you play built-in backing tracks or user-imported songs (via SD card).
You can jam along or use it for structured practice.
6. CLICK
Turns the metronome on or off.
Essential for practicing in time.
7. MENU
Access deeper system settings: MIDI, trigger settings, Bluetooth, file imports, and more.
Think of this as the “settings” section of the module.
8. EXIT
Use this to go back or exit from a menu or screen.
9. CURSOR / VALUE Buttons
Use arrow keys to move between menu options.
Use the + / – buttons or value dial to change settings or scroll faster.
10. MASTER VOLUME
Controls the overall volume of your headphones or speakers.
11. MIX-IN & BLUETOOTH VOLUME
Adjusts the volume of external audio — like music from your phone via Bluetooth or AUX cable.
Deep Dive – Roland TD-17 Buttons & Functions
Step-by-step instructions, plain and easy
1. KIT Button
What it does:
The KIT button lets you scroll through different drum kits. Each kit is a complete drum setup with its own sounds and effects.
How to use it:
Press the KIT button.
Use the Value Dial or + / – buttons to switch between kits.
The screen will show the kit’s name (e.g., "Rock Kit", "Funk Groove", "808 Electro").
To save a favorite, press and hold a number to assign a quick slot (optional).
✅ Use this when: You want to switch between styles quickly — for practice, recording, or live performance.
2. EDIT Button
What it does:
Opens the edit menu for the currently selected kit — where you can customize sounds, volume, tuning, effects, and more.
How to use it:
Press the EDIT button.
Use the arrows to move between settings like:
Pad Settings (change snare sound, adjust tuning)
Ambience (reverb level)
EQ & Compression
Use + / – or the dial to adjust values.
Press EXIT to go back.
Use this when: You want to make a kit sound exactly how you like it.
3. INST (Instrument) Button
What it does:
Lets you choose and change the instrument (sound) assigned to each pad.
How to use it:
Hit any pad (e.g., snare, tom) — it will show the sound that’s assigned.
Turn the dial to pick a new sound (e.g., switch snare to rimshot or tom to cowbell).
Use arrows to adjust pitch, volume, or pan (left/right) for that pad.
✅ Use this when: You want to swap or tweak the sound of a specific pad.
4. COACH Button
What it does:
Gives you practice tools built into the module. Helps improve timing, speed, and rhythm.
How to use it:
Press COACH
Choose from different exercises:
Time Check – play along and see how accurate you are
Quiet Count – metronome drops out, you keep the beat
Warm-up – guided daily routine
✅ Use this when: You want to practice with structure or improve your timekeeping.
5. SONG Button
What it does:
Plays internal songs or tracks you load from an SD card — so you can jam along.
How to use it:
Press SONG
Choose from built-in tracks
If you insert an SD card, you can select your own songs (MP3/WAV)
Use the Start/Stop button to control playback
Mix song volume separately from drum volume
Use this when: You want to play along with backing tracks or practice with music.
6. CLICK Button
What it does:
Turns the metronome (click) on and off.
How to use it:
Press CLICK once to start the metronome
Press it again to stop
You can go into the CLICK settings to change:
Tempo (BPM)
Sound (click tone)
Volume
Time signature (e.g., 4/4, 3/4)
✅ Use this when: Practicing, recording, or playing live — staying in time is everything.
7. MENU Button
What it does:
Opens the main system menu — all deep settings live here.
How to use it:
Press MENU
Use arrows to navigate between tabs:
Trigger Settings (for adjusting sensitivity)
MIDI Settings (for connecting to a computer)
Bluetooth Setup
System Settings (language, contrast, etc.)
✅ Use this when: You’re setting up your module, making global changes, or troubleshooting.
8. Cursor Arrows + Value Dial / + – Buttons
What they do:
Let you move around menus and change values.
How to use them:
Arrows move you left/right/up/down through options
Dial or + / – adjust the selected value
Dial is quicker for scrolling
✅ Use this all the time when working in menus, editing sounds, or setting tempos.
9. MASTER VOLUME
Controls everything you hear — headphones or speaker out.
✅ Always check this if you think there’s “no sound.”
10. MIX-IN / BLUETOOTH VOLUME
Adjusts external audio (from your phone, MP3 player, or Bluetooth connection)
✅ Helps you balance your music with your drums when jamming along.
TD-17 – Pad Settings
Complete Guide to Pad Types and Trigger Configuration
Overview
The Pad Settings menu allows you to define how each pad (or cymbal) behaves when you hit it. It's one of the most important areas in your module setup because it controls how responsive, accurate, and realistic your playing will feel.
This is where you:
Select the correct pad model or equivalent
Adjust sensitivity, retrigger cancel, scan time, threshold, and more
Prevent false triggers or missed notes
Maximize compatibility (even with non-Roland pads)
Even if you're not using Roland pads, the module provides trigger presets that can work with many third-party pads such as ATV, Jobeky, Drum-Tec, or hybrid triggers.
Part 1: Pad Type Selection
Each trigger input (e.g., snare, toms, ride, crash) needs to be assigned a pad type that best matches the physical pad you're using. The TD-17 has a list of built-in pad models, including:
Common Roland pad models listed:
PDX-8, PDX-12, PDX-100 (mesh head snare/toms)
KD-10, KD-9 (kick pads)
CY-5, CY-8, CY-12C, CY-13R, CY-14C, CY-15R (cymbals)
VH-10, VH-11 (hi-hats)
BT-1 (bar trigger)
If you're using a non-Roland pad, choose the one that behaves most similarly (typically a single- or dual-zone pad with similar dimensions and response).
How to do it:
Hit the pad you want to configure
Go to the Pad Settings > Type screen
Use the dial or +/– buttons to select the closest matching model
If your pad is a third-party product, trial and error with sensitivity and threshold adjustments may be required.
Part 2: Key Trigger Parameters
Each pad or cymbal also has a series of detailed settings. Below is a breakdown of each parameter and how it affects performance:
1. Sensitivity
What it does:
Controls how much force is needed to trigger a sound. Higher sensitivity = easier triggering.
Use it for:
Adjusting dynamics to match your playing style
Making quiet hits trigger more easily
Avoiding accidental hits if too sensitive
Tip:
Start around 6–9 for mesh pads, then fine-tune.
2. Threshold
What it does:
Sets the minimum strength (velocity) a hit must reach to trigger a sound.
Use it for:
Ignoring light touches or hand noise
Preventing ghost triggers from vibration
Tip:
If quiet hits aren't being triggered, lower the threshold slightly.
3. Scan Time
What it does:
Determines how long the module listens for a full signal from the pad after a hit.
Use it for:
Fine control of response time
Fixing double-triggers or dropouts
Tip:
Shorter scan = faster response, but more risk of misfires. Most pads work well between 1–3 ms.
4. Mask Time
What it does:
Prevents a second trigger from registering too soon after the first — useful for fast rolls or double strokes.
Use it for:
Eliminating double hits
Improving realism during fast playing
Tip:
Start around 10–12 ms. If fast rolls are cutting out, lower it.
5. Retrigger Cancel
What it does:
Works with mask time to ignore vibrations that might cause extra unwanted triggers.
Use it for:
Preventing misfires on mesh heads or cymbals
Cleaning up response in high-gain situations
Tip:
Higher values cancel more aggressively. Adjust slowly while playing rolls.
6. Xtalk Cancel (Cross Talk Cancel)
What it does:
Prevents vibration from one pad triggering a nearby pad.
Use it for:
Isolating pads from each other (especially toms or cymbals near the snare)
Fixing false triggers caused by loud hits on nearby pads
Tip:
Increase slowly until false triggers stop, but not so high that real hits get missed.
7. Rim Gain / Rim Sensitivity
What it does:
Controls how sensitive the rim zone is (for dual-zone pads like snares and toms).
Use it for:
Balancing head-to-rim volume
Ensuring reliable rimshot detection
Tip:
Use a mid-range setting and adjust based on your stick angle and playing habits.
8. Head-Rim Adjust
What it does:
Tells the module how much separation to expect between head and rim hits.
Use it for:
Making sure rimshots and headshots trigger correctly
Avoiding confusion between zones
Tip:
If rimshots trigger both zones or don't work, tweak this value.
9. Positional Sensing (for compatible pads only)
What it does:
Detects where on the pad (center vs. edge) you're hitting — available on pads like the PD-128/140.
Use it for:
Creating more realistic sound variations
Enabling features in certain kits that respond to position
Tip:
Only works on certain pads and with modules that support it (TD-27, TD-50; TD-17 has limited support).
10. Rim Shot Type
What it does:
Defines how the module responds to simultaneous head and rim hits.
Use it for:
Setting the rim to trigger as a rimshot or a different sample
Tailoring response for hybrid setups
Chapter 1: Hi-Hat Settings (VH-10 / VH-11 / CY-5 and others)
What Are Hi-Hat Settings?
The hi-hat is one of the most expressive parts of the drum kit — and also one of the most complex to set up on an electronic drum module. In the Hi-Hat Settings menu of the TD-17, you control how the module interprets your foot movements, pad position, and how open or closed the cymbal is.
Supported Hi-Hat Pads:
VH-10 / VH-11 (top and clutch-style)
CY-5 / CY-8 (for entry-level or single-piece e-hats)
Compatible 3rd-party hi-hats (may require adjustment)
Main Hi-Hat Parameters:
1. Hi-Hat Type
Select the exact model you're using (e.g., VH-10).
This ensures correct response curves and calibration behavior.
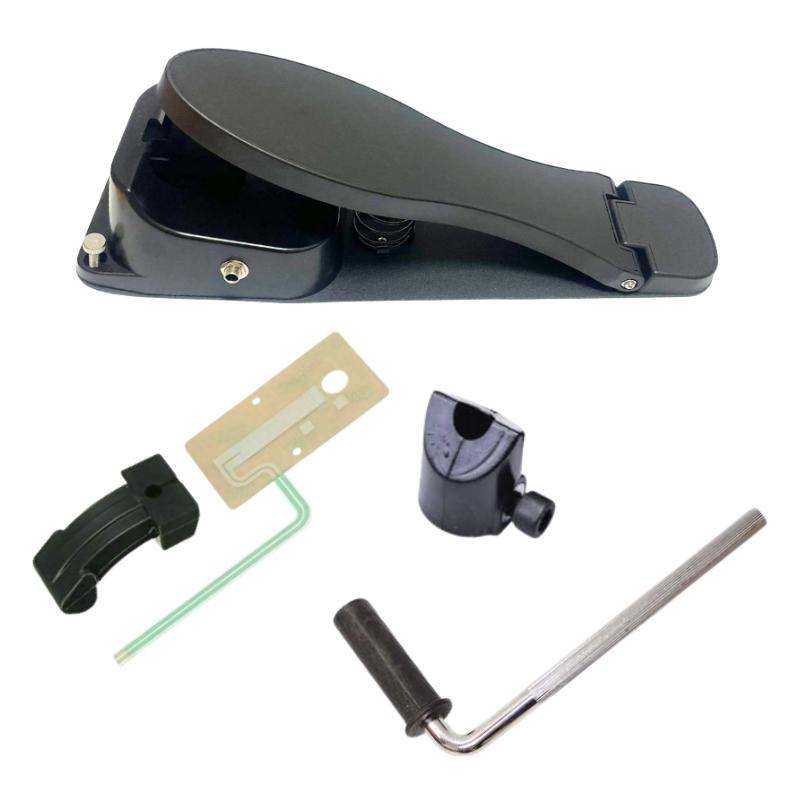
2. Offset Adjustment
Found in the Setup Wizard or the hi-hat section of Pad Settings.
You must press the foot pedal fully down and hit “SET” — this tells the module what “fully closed” means for your hardware.
If not set correctly, open/close transitions will feel wrong or behave inconsistently.
✅ Do this once when you first install your hi-hat or if it starts behaving oddly.
3. Sensitivity
Adjusts how responsive the hi-hat is to foot pressure.
Higher sensitivity makes the module more reactive to small movements.
Lower it if the hi-hat opens too easily or behaves inconsistently.
4. Foot Splash Adjust
Controls how the system responds to quick foot splashes.
Increase if your foot splashes feel too soft or don’t trigger cleanly.
5. Hi-Hat Volume
Can be adjusted separately from the rest of the kit to balance levels in a live or recording setting.
Tips for Realistic Hi-Hat Performance:
Use a proper hi-hat stand with good clutch tension.
Re-run the Offset Calibration if you change your pedal height or pad position.
Practice smooth foot control — this affects how well “half-open” and “splash” articulations work.
Chapter 2: Trigger Calibration
What Is Trigger Calibration?
Trigger Calibration tells the module how your specific pads respond to your playing — especially mesh pads and cymbals. While default settings are good for most cases, calibration ensures optimal sensitivity, eliminates misfires, and gives you better dynamic control.
When to Calibrate:
When you change pads or cables
After installing 3rd-party pads
If you notice:
Double triggering
Missed hits
Inconsistent response
How to Calibrate a Pad:
Go to MENU > Pad Settings > Calibration
Select the pad or trigger you want to calibrate (e.g., Snare, Kick)
Follow the instructions:
Hit the pad softly, then hard, then medium
The module will record response data
Save the calibration when prompted
Some pads (like the VH-10 hi-hat) may have their own special calibration process. Be sure to follow the prompts on screen.
Tips:
Use your actual sticks when calibrating — don’t tap with your fingers.
Calibrate each pad individually for best results.
Make small adjustments to Sensitivity and Threshold after calibration to fine-tune.
Chapter 3: Advanced Pad Assignments
Custom Sounds, Dual Zones & Layering on the TD-17
What Are Advanced Pad Assignments?
Beyond basic setup, the Roland TD-17 allows you to customize how each pad or cymbal triggers sounds. You can assign different instruments (samples) to different parts of the same pad — like the rim, bow, or edge — and even layer sounds for creative effects.
This gives you:
More expressive possibilities
Greater control over your drum kit’s character
The ability to build custom hybrid kits
Dual-Zone Pads and Cymbals
Many Roland pads are dual-zone or triple-zone, meaning they can trigger more than one sound depending on where or how you hit them.
Examples:
Snare: Head = main snare / Rim = rimshot or sidestick
Tom: Head = tom / Rim = percussion or effect
Ride: Bow = ride sound / Edge = crash / Bell = bell tone (with CY-13R or CY-15R)
Crash: Bow = crash / Edge = choke or second crash
How to Assign Sounds to Zones:
Go to Pad Settings > INST (Instrument)
Hit the pad area (head or rim) you want to edit
Use the dial or +/– to choose a new instrument
Repeat for the other zone (rim, bell, etc.)
You can assign:
Acoustic drum sounds (snares, toms, kicks)
Electronic sounds (808s, 909s)
Cymbals (crash, splash, ride)
Percussion (congas, claps, shakers)
Effects (FX sweeps, vocal hits)
Layering Techniques
While the TD-17 doesn’t allow true sample layering like the TD-50, you can still simulate layers using:
Rim zones to play a secondary layer (like a clap over snare)
Velocity switching (assign a louder version of the same sound at higher hit strengths)
Using the same pad twice via MIDI (advanced)
Real-World Examples:
Snare Pad:
Head = main snare
Rim = sidestick or clap
Ride Cymbal (CY-13R):
Bow = clean ride
Edge = crash or ride wash
Bell = ride bell
Tom Rim:
Add cowbell, tambourine, or handclap for hybrid grooves
Tips for Creative Assignments:
Use unusual pairings (e.g., snare + clap, floor tom + sub drop)
Use rim zones for effects (e.g., airhorn, voice sample)
Don’t overload your kit — balance realism with creativity
Save your custom kits so you can quickly recall them live or in practice
Saving Your Work:
Once you’ve finished your assignments:
Press WRITE
Choose a user kit slot
Name your kit for easy access later
Chapter 4: Setting Velocity Ranges
Control the Dynamics and Expression of Each Pad
What Is a Velocity Range?
In electronic drums, velocity refers to how hard you hit the pad — and the module responds with a volume level and often a different tone based on your playing intensity.
The velocity range lets you control:
When a certain sound will trigger (based on how soft or hard you play)
The dynamic response curve (how quickly it gets louder)
The range of expression for each instrument assigned to a pad
This is useful for:
Making quiet strokes sound delicate
Triggering alternate samples at high velocities
Avoiding harsh or unrealistic volume jumps
How to Set Velocity Ranges in the TD-17
Press the INST button
Hit the pad you want to adjust (e.g. snare head or rim)
Press the Function (F1–F3) button for “Velocity Settings”
(or scroll to the “Velocity” tab depending on firmware)
You’ll see parameters like:
Key Velocity Parameters:
1. Min Velocity
The lowest velocity that will trigger the pad
Any hits softer than this will be ignored
Use it to:
Filter out unwanted ghost notes
Make pads feel tighter or more deliberate
2. Max Velocity
The ceiling for the velocity range
Anything harder than this is treated as a maximum-strength hit
Use it to:
Soften overly aggressive hits
Compress the dynamic range for more consistent volume
3. Velocity Curve
This is the shape of the response between soft and hard hits.
Common options:
Linear – standard 1:1 response
Loud 1/2/3 – gets louder more quickly with less effort
Soft 1/2/3 – requires harder playing to reach high volume
EXP (Exponential) – very responsive to light hits
LOG (Logarithmic) – responsive to harder hits
Use it to:
Match the feel of an acoustic kit
Customize to your personal touch
Why It Matters:
Getting your velocity settings right means your electronic drums will respond more naturally — just like a real acoustic set would. It also helps if:
You’re a soft player who wants maximum output
You want precision control in recording situations
You're layering samples and want them to trigger only at specific velocities
Practical Example – Snare Pad:
Assign Snare A for velocities 1–100
Assign Snare B or a rimshot/clap to trigger only at velocities 101–127
This allows you to play normally and get a second variation only when you hit hard — no extra pads needed.
Chapter 5: Importing and Triggering User Samples
Load Your Own Sounds Into the TD-17
What Are User Samples?
User Samples are audio files (WAV) that you import into your TD-17 module from an SD card. Once imported, you can assign them to any pad or zone, just like built-in instruments.
This allows you to:
Use your own sounds (e.g. custom snares, kicks, effects)
Add vocal phrases, backing hits, FX, 808s
Build hybrid kits for live shows or creative practice
File Requirements
Before importing, make sure your files meet these specs:
| Format | .WAV (16-bit, mono or stereo) |
|---|---|
| Sample rate | 44.1 kHz only |
| File size | Up to 2MB per sample |
| Length | Around 10 seconds max per sample |
| SD card format | FAT32-formatted SD/SDHC card (up to 32GB) |
Step-by-Step: How to Import a User Sample
Prepare Your SD Card:
Insert SD card into your computer
Create a folder called /ROLAND/TD17/IMPORT/
Place your WAV files inside this folder
Insert SD Card Into the TD-17:
Power off the module, insert the card, then power on
Go to: MENU > Import > User Sample
Browse the folder
Select the file you want to import
Choose a User Sample slot (there are 100 available)
Press Import and wait for it to finish
Assign the Sample to a Pad:
Press the INST button
Hit the pad you want
Use the dial to scroll to your sample (under “User Sample” category)
Managing User Samples
You can rename, delete, or re-import samples anytime
Use MENU > User Sample List to view all samples in memory
Delete unused samples to free up space
Tips for Best Use
Use mono samples if possible to save memory
Short sounds like claps, FX, triggers work best
You can layer user samples with built-in sounds via rim/head zones
Use Velocity Switch to trigger different samples at different hit strengths
Creative Uses for User Samples
Assign a custom snare to the head and a vocal “hey!” to the rim
Use an 808 kick on the kick pad and trigger bass drops on a tom
Import click tracks or loops for performance